Woods
View
Lakes
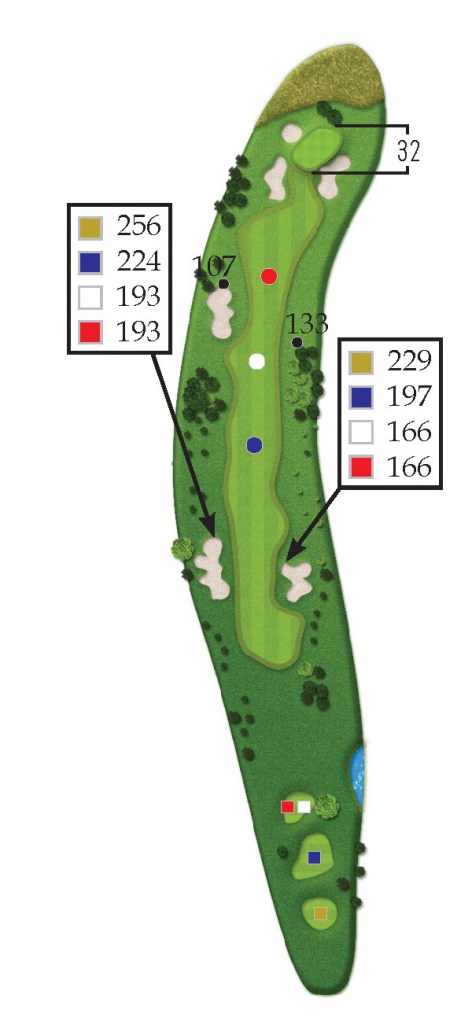
HOLE 1 The Woods PAR 5
A short par 5 that allows for the easiest chance at birdie on this nine.
Tee shot: Down the left side offers the best chance to get to the green in two.
Lay-up: Go for the green in two through the opening or take aim at the 100 yard marker.
Approach: A downhill short approach to a large green.


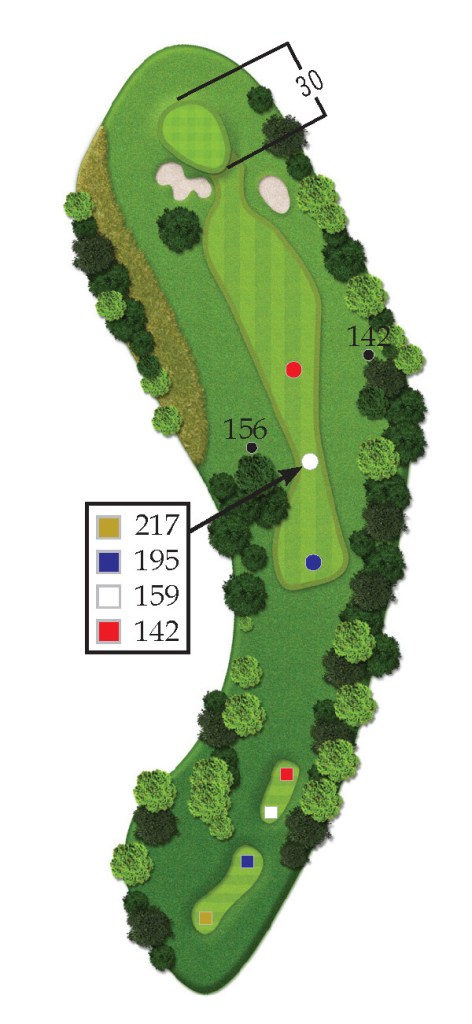
HOLE 2 The Woods PAR 4
Notes: A short par 4 that demands a right to left tee shot.
Tee shot: Move the ball right to left to keep the ball in the fairway or take aim at the 150 yard marker.
Green: An upside down bowl of a green.
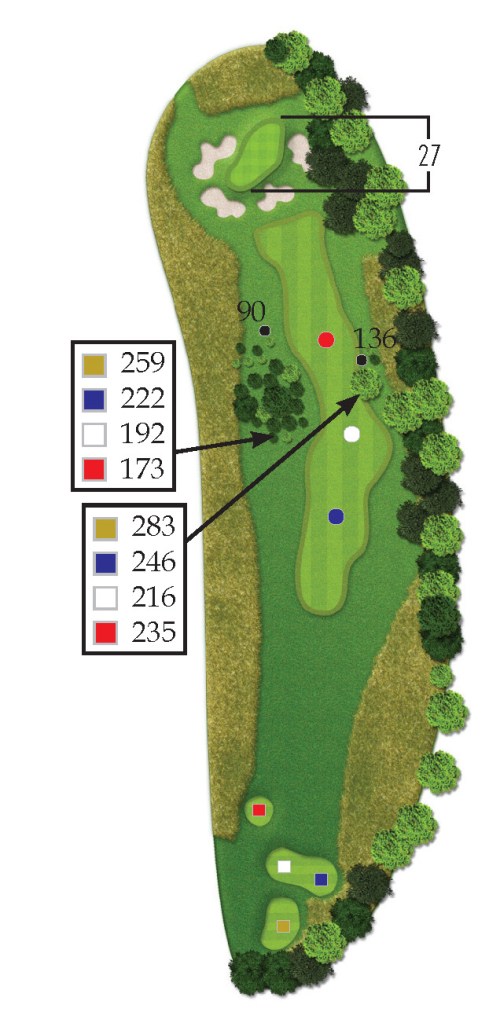
HOLE 3 The Woods PAR 4
Notes: Trees force a decision on this mid-length par 4.
Tee shot: Either go for hitting a driver straight and true or take less club to ensure that the ball can get over the trees on the second shot.
Green: Heavily guarded, heavily sloped green that requires the deftest of touches.

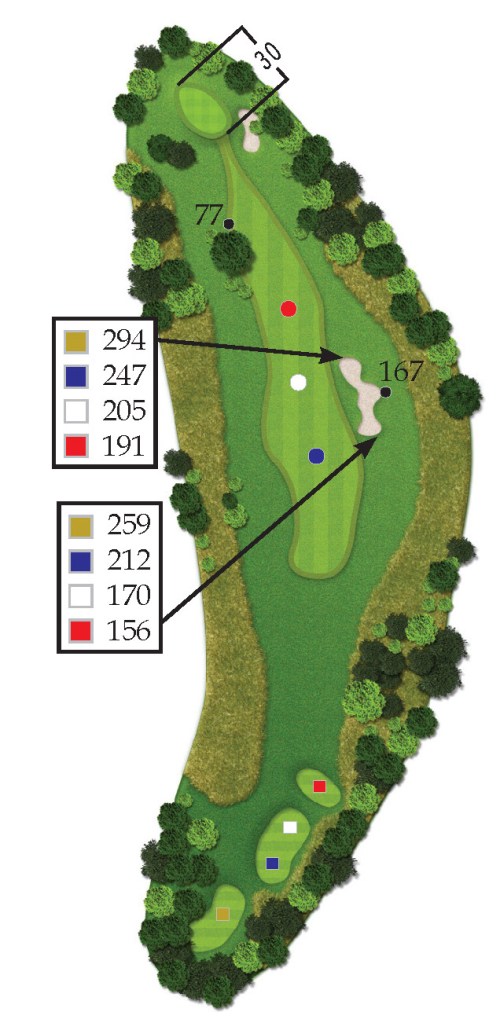
HOLE 4 The Woods PAR 4
Notes: Positioning off the tee makes or breaks this par 4.
Tee shot: Aim at the left end of the fairway bunker and keep the drive on the left side of the fairway to keep from being blocked out by the trees near the green.
Approach: The miss, should it come, is to the left of the green.
Green: False front, sloping left to right.
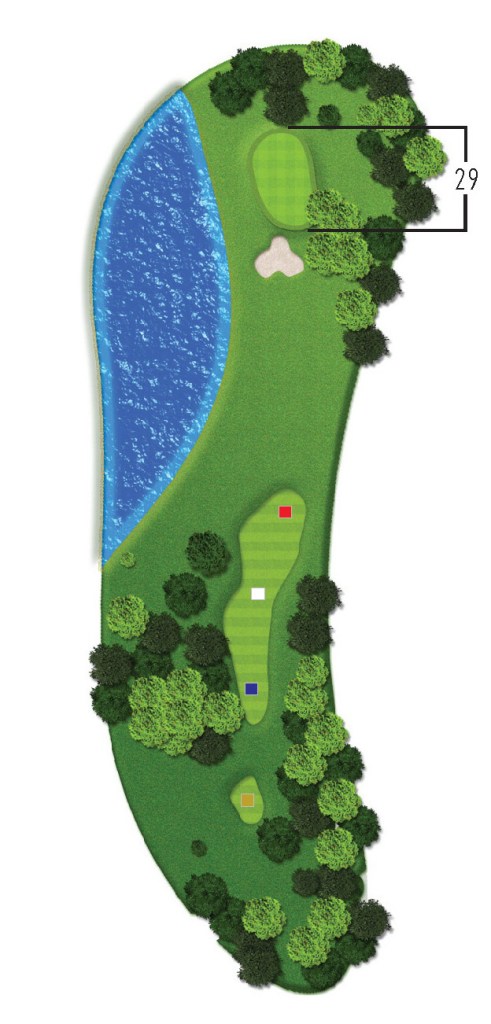
HOLE 5 The Woods PAR 3
Notes: Beautiful, strait-forward par 3.
Tee shot: Everything will release from right to left on landing.
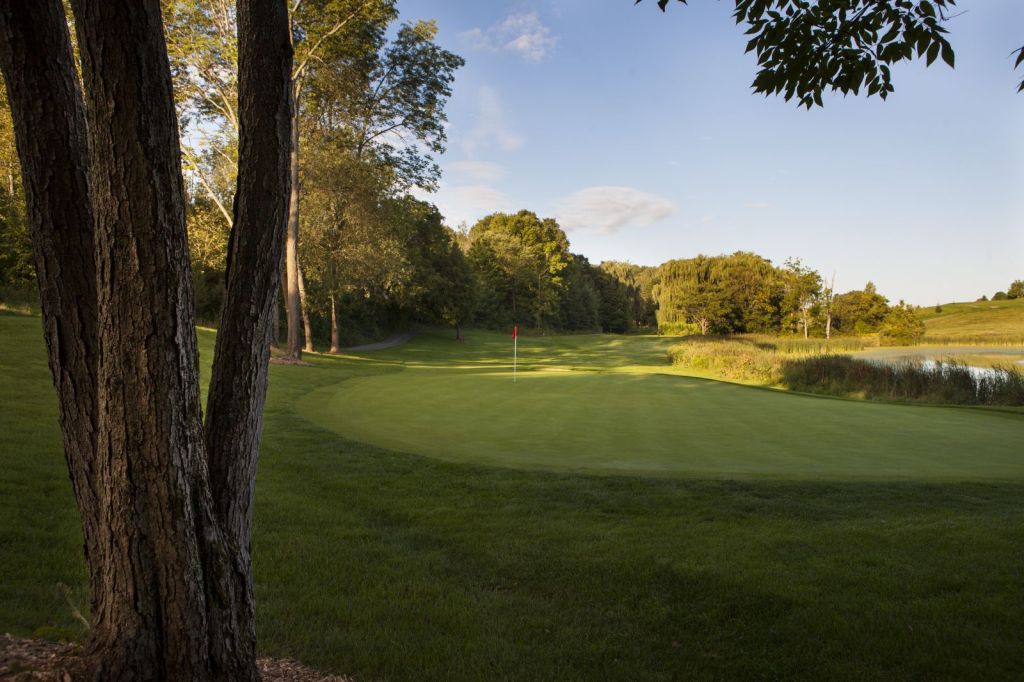
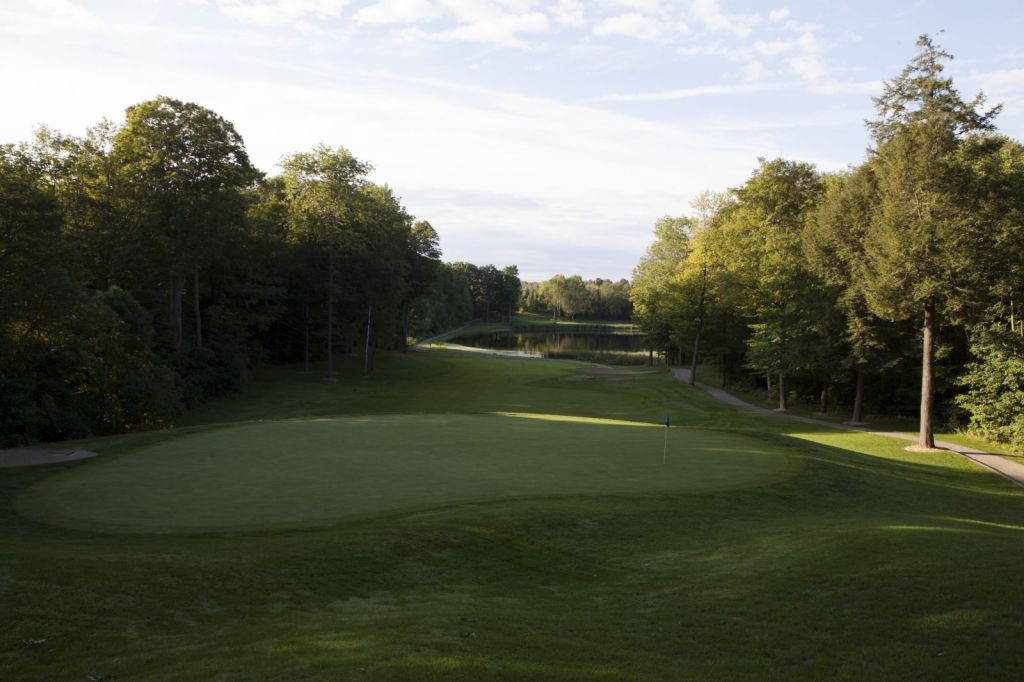
HOLE 6 The Woods PAR 4
Notes: Our easiest par 4 at Nobleton Lakes.
Tee shot: If the pin is right, play to the middle, taking the front bunker out of play.
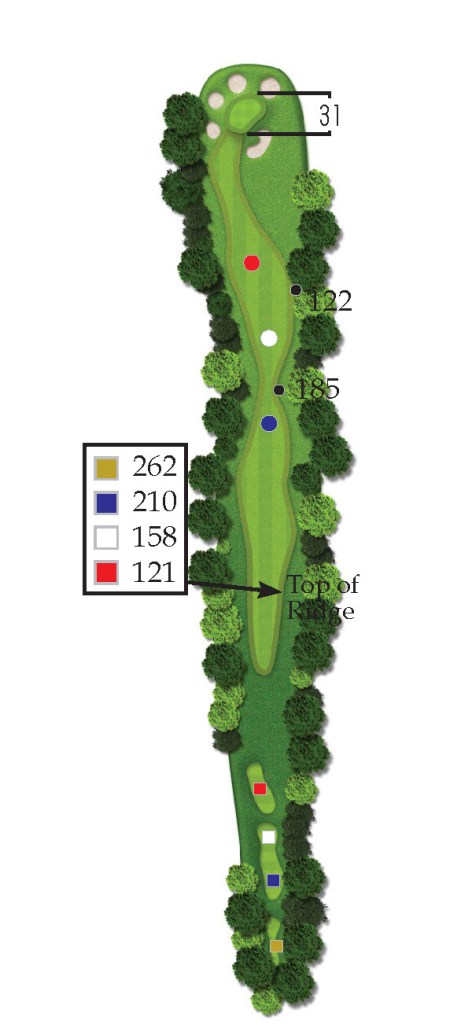
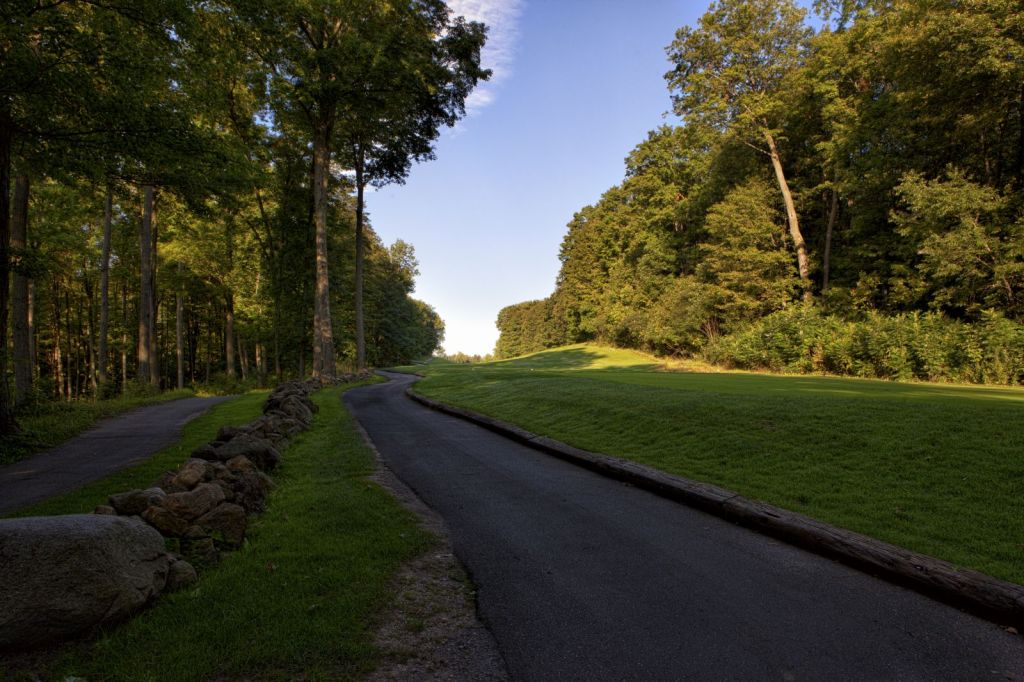
HOLE 7 The Woods PAR 5
Notes: A long, demanding, sinister par 5.
Tee shot: All straight, tee shots will collect in the first valley.
Approach: Confident with the short game, go for the second valley and get close tot he green. Otherwise, keep the ball on the second plateau, no closer than 120 out, for an easier approach.
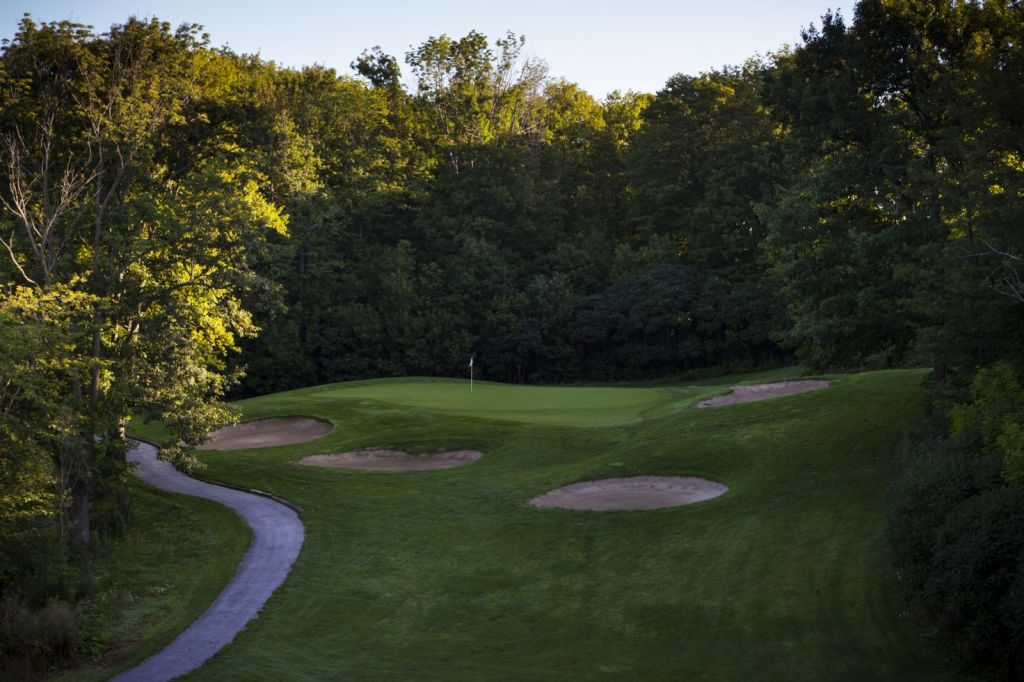
Green: Generous, but slopes from back to front.
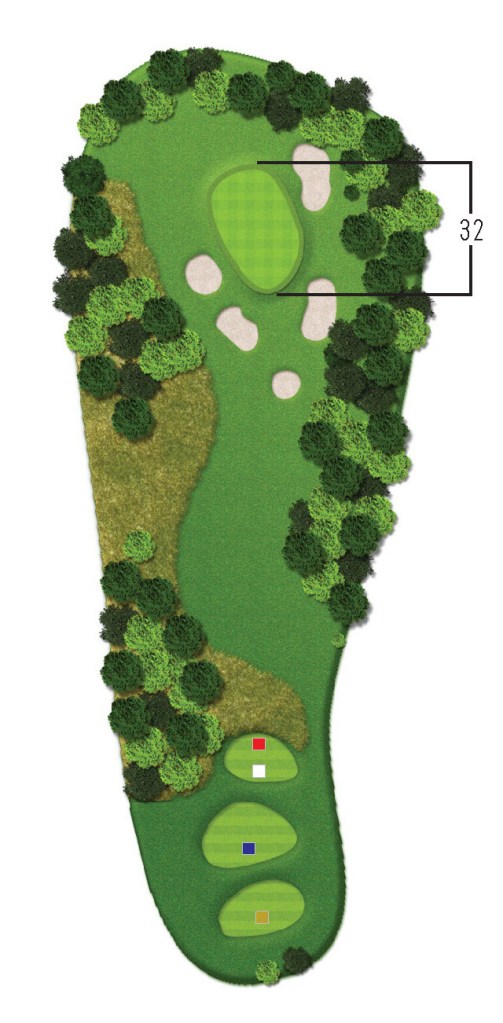
HOLE 8 The Woods PAR 3
Notes: An intimidating mid-length par 3.
Tee shot: Any shot on the green is a good shot, regardless of the pin.
Green: The whole green complex slopes from right to left.
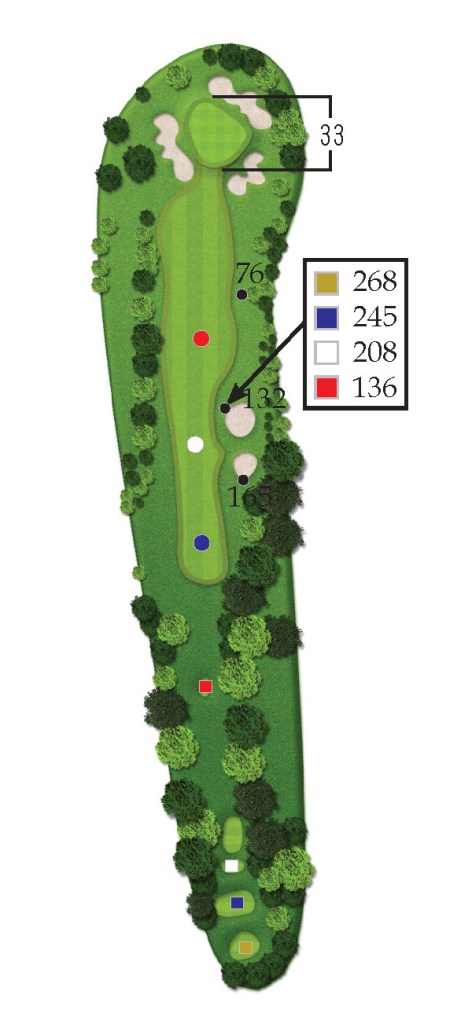
HOLE 9 The Woods PAR 4
Notes: An uphill mid-length par 4.
Tee shot: Up the left side offords the best angle into the green.
Approach: False front, elevated green, prevailing wind. Take an extra club.


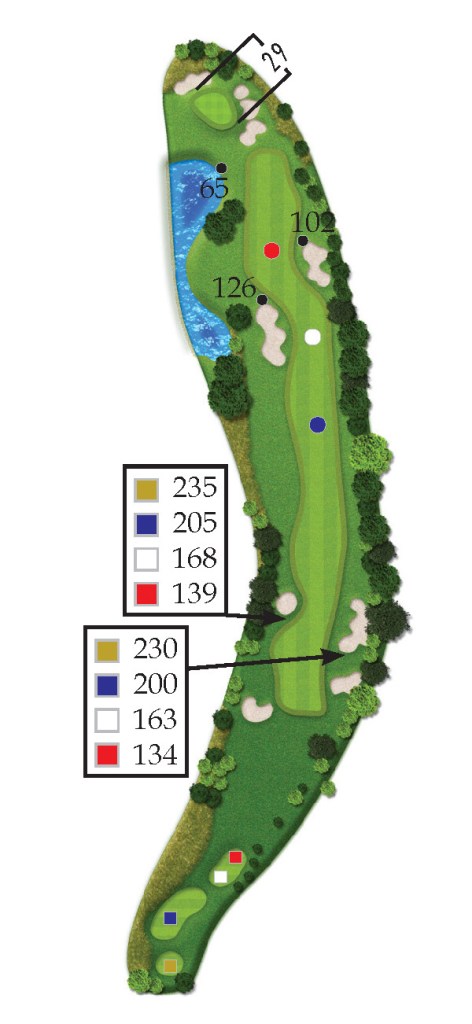
HOLE 1 The Lakes PAR 5
A long, multi-faced par 5.
Tee shot: A tee shot placed at the top of the hill is ideal.
Lay-up: Anywhere in the fairway between the 100 and 150 yard markers keeps the approach on the same level as the green..
Green: Leave the approach below the hole as the green is severely sloped from back to left.
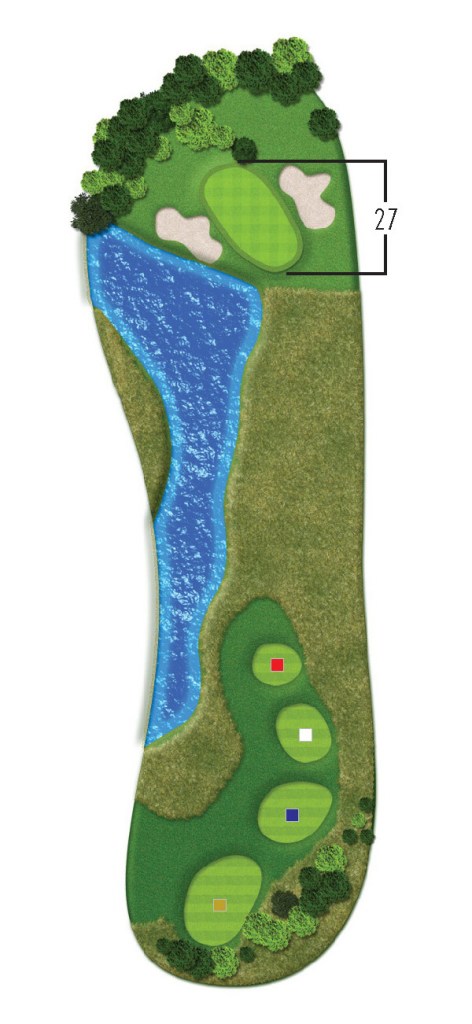
HOLE 2 The Lakes PAR 3
Notes: A pretty par 3 that can turn on anyone very quickly.
Tee shot: Middle of the green is never a bad thing. Be mindful of the wind, as the tee is sheltered on this hole.


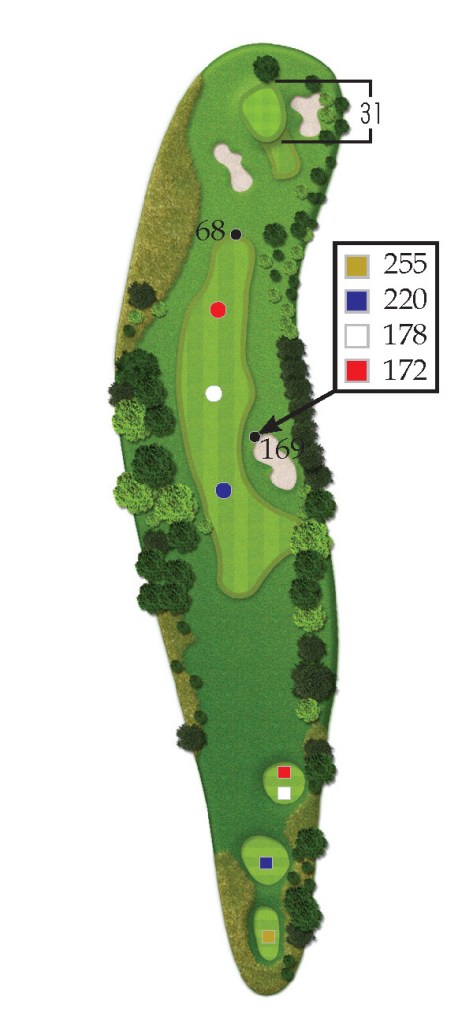
HOLE 3 The Lakes PAR 4
Notes: A long par 4 that plays much longer due to a severely elevated green.
Tee shot: A tee shot placed up the left side of the fairway allows for a better approach angle.
Approach: Study the yardage carefully. The elevation change requires an extra club or two.
Green: The false front of this green turns good shots into bad results.

HOLE 4 The Lakes PAR 4
Notes: The wide fairway of this par 4 challenges any golfer to hit the longest drive of the day.
Tee shot: Favour the right side as most drives will kick down into the middle of the fairway.
Approach: Generally into the prevailing wind with a modestly elevated Green.
Green: Severely sloped from back to front with a difficult hump in the middle. Place the ball on the same sides as the pin for an easier puff.
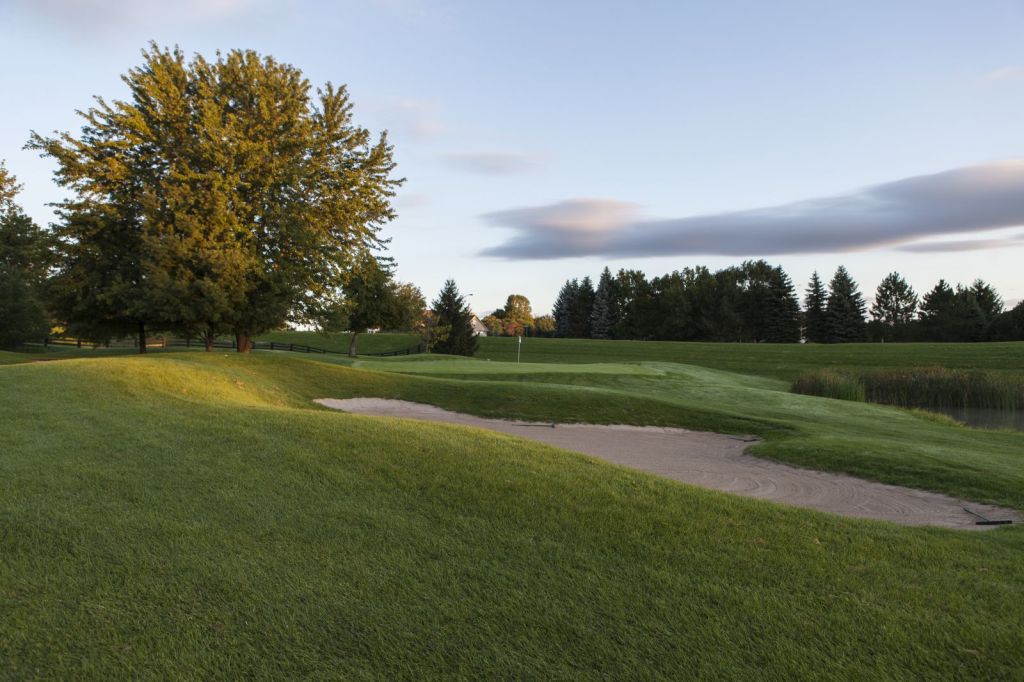
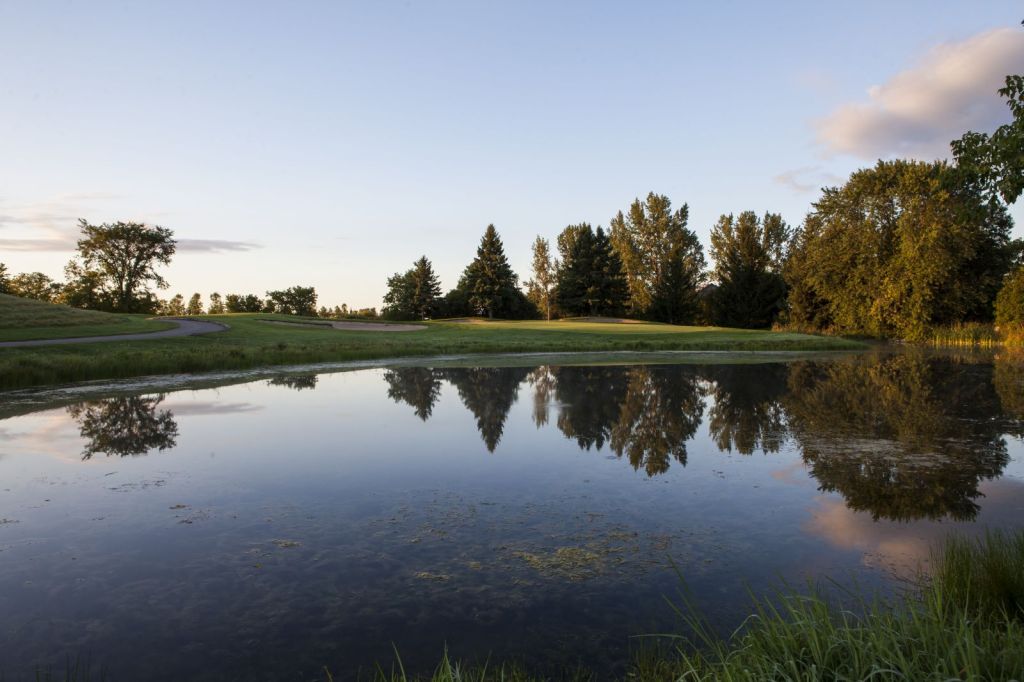
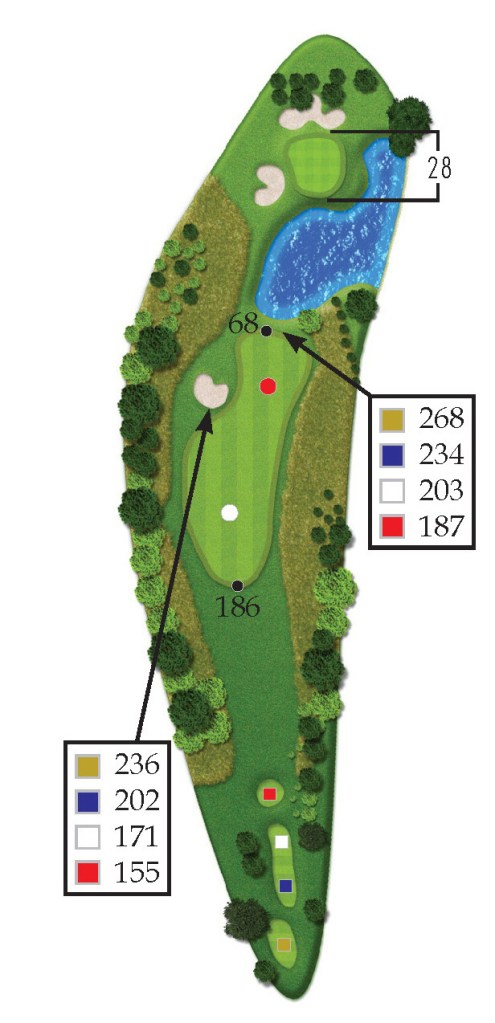
HOLE 5 The Lakes PAR 4
Notes: While on the shorter side, this par 4 can present many problems for any golfer.
Tee shot: Keep it simple and play to the 150 yard marker.
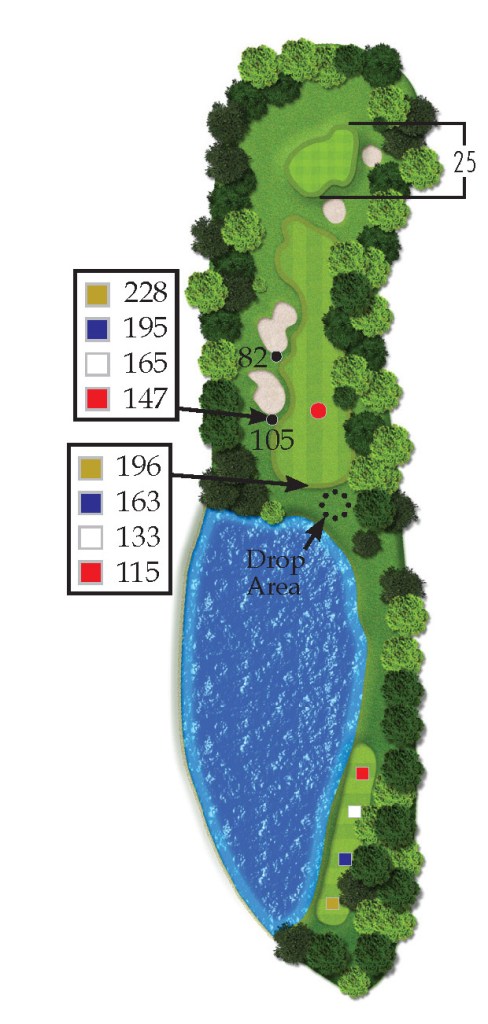
Approach: A forced carry over water to a completely protected green.
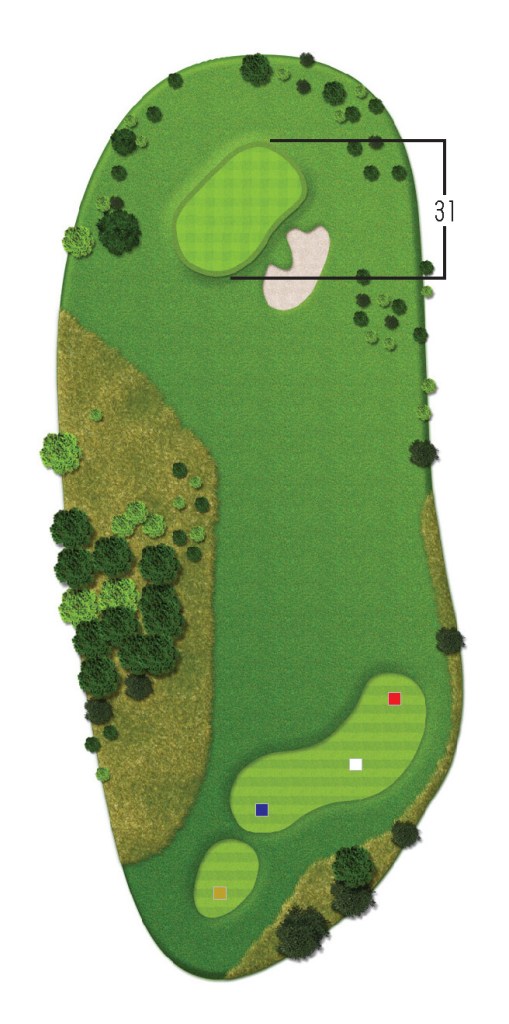
HOLE 6 The Lakes PAR 3
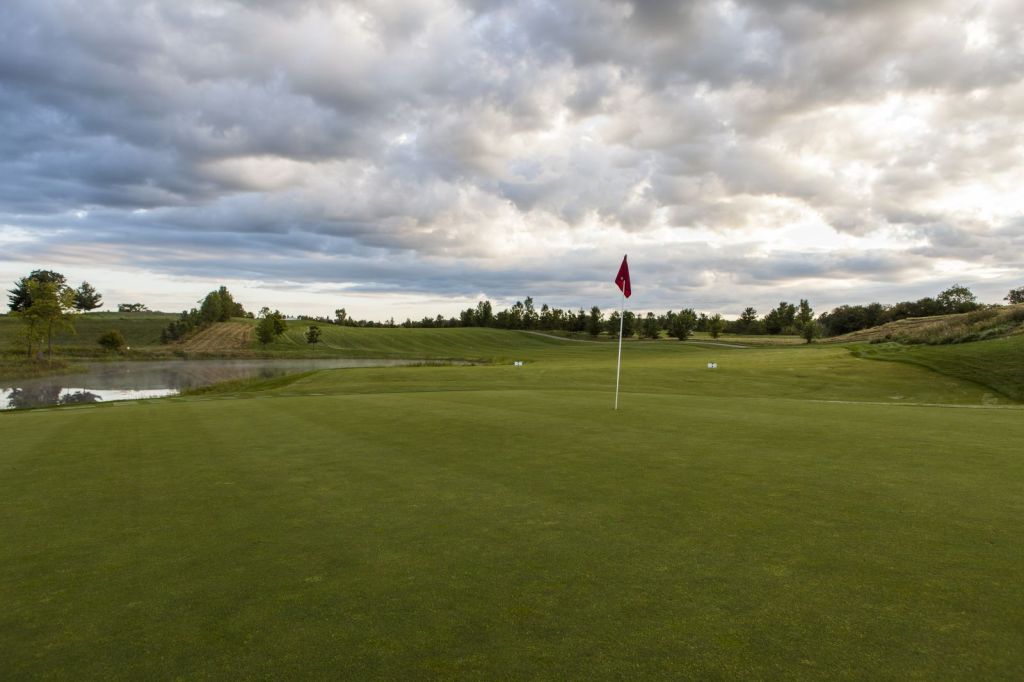
Notes: Without doubt, our most beautiful par 3.
Tee shot: Don’t let the water intimidate. Calculate the yardage to clear the pond and swing freely.
Approach: An extra club or two is required to compensate for the elevated green. There is a drop area at the corner of the pond.

HOLE 7 The Lakes PAR 5
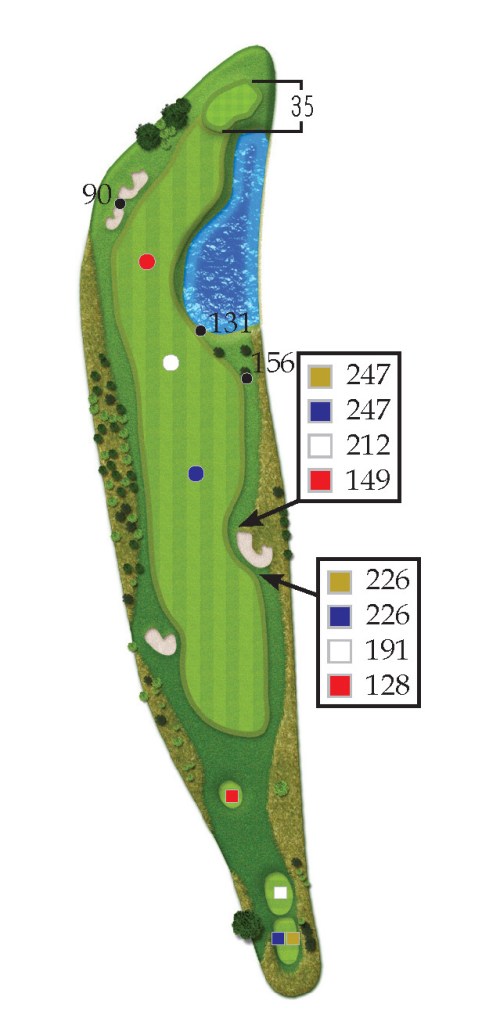
Notes: A short downhill par 5 that provides the best chance of birdie on this nine.
Tee shot: Hit it down the middle and hit it long.
Approach: There is not a lot of room for error if you are going for this hole in 2 shots. If you are laying up, aim at the two left bunkers well away from the water.
Green: A shallow green that penalizes any shot that doesn’t hit it.
HOLE 8 The Lakes PAR 4
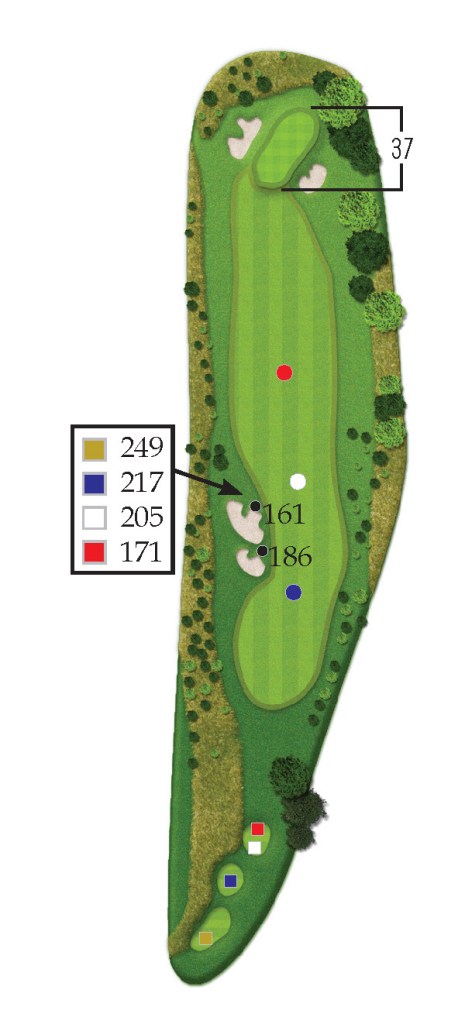
Notes: A short par 4 with a achallenging approach.
Tee shot: A drive over the best bunkers will leave the best approach options.
Approach: An easy approach if the pin is cut on the left side of the green. A pin cut on the right half brings the front bunker and trouble both right and long into play.
Green: This green is known for its subtle unseen breaks.


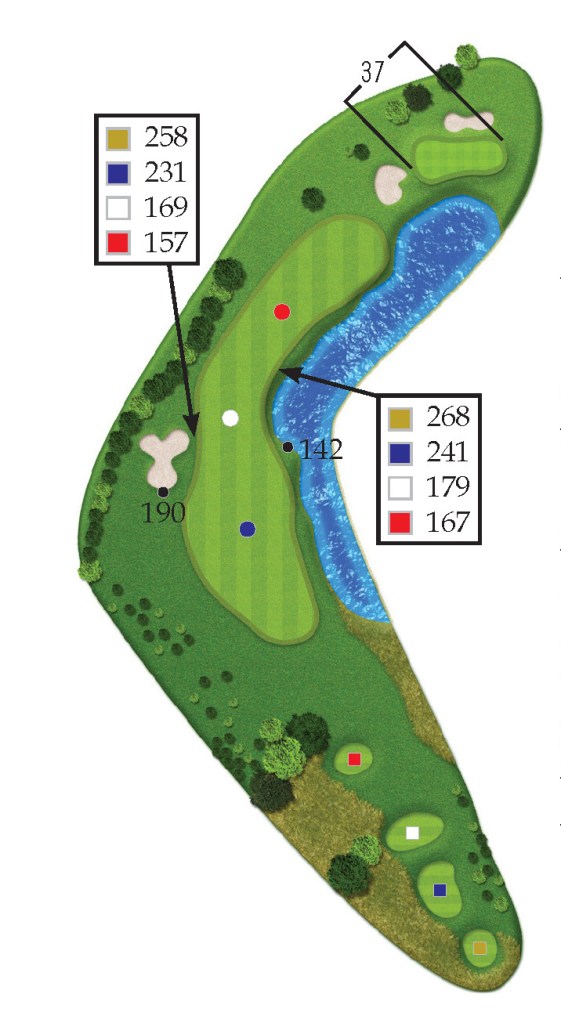
HOLE 9 The Lakes PAR 4
Notes: No easy finish with this dog-leg right par 4.
Tee shot: The more water carried with the tee shot, the less yardage required to negotiate on the approach.
Approach: A high, soft landing shot well up the green is required from anywhere.
Green: Severely sloped from back to front. A putt from behind the hole will run and run and run.
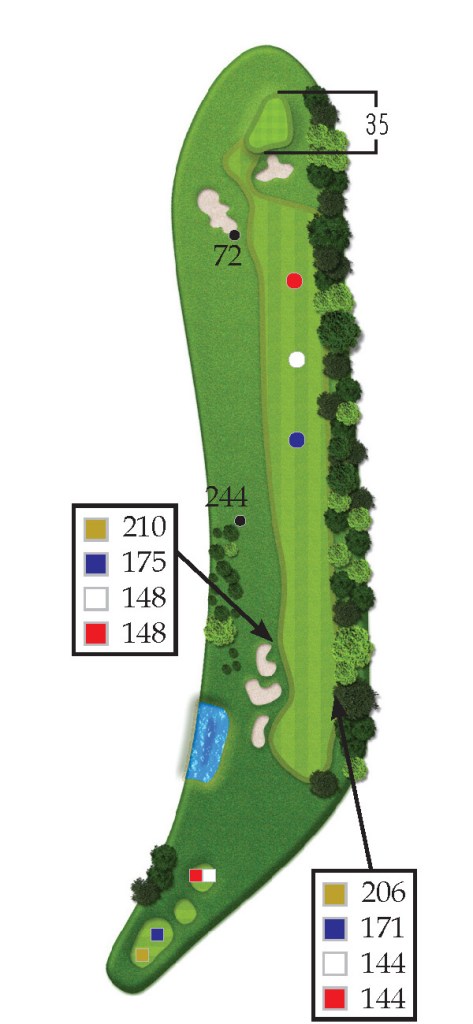
HOLE 1 The View PAR 5
Notes: Last chance for birdie with this par 5.
Tee shot: A good drive aimed over the bunkers on the left will set up a long, downhill second shot.
Approach: If not going for it in two, the target is the flat area at the bottom of the hill that begins inside the 100 yard marker.
Green: The front half of the green slopes towards the fairway. The back half slopes away.

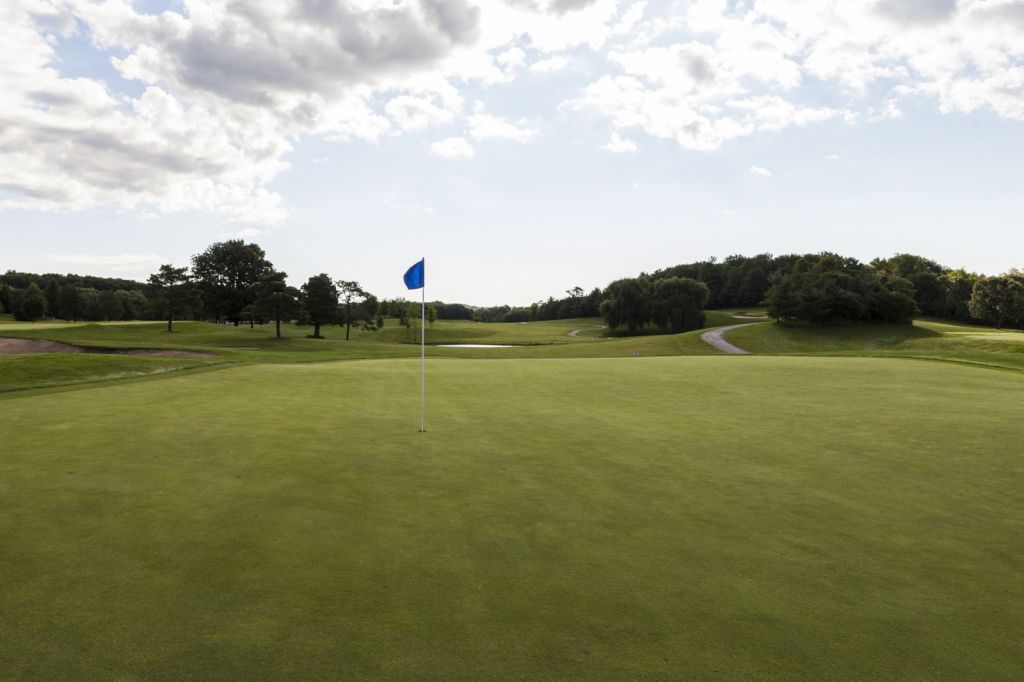
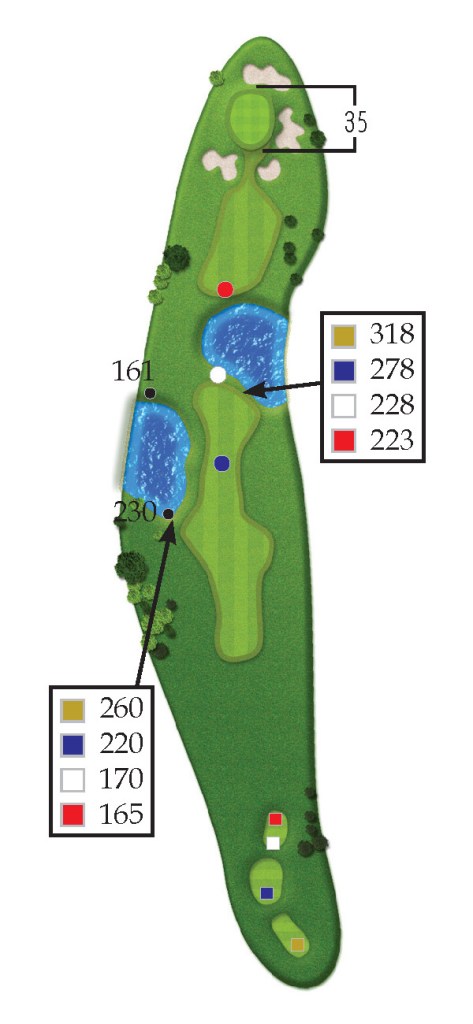
HOLE 2 The View PAR 4
Notes: This par 4 is possibly the toughest hole at Nobleton Lakes.
Tee shot: The tee shot should be kept up the right side of the fairway to avoid the water that is just beyond the willow trees on the left. Too long of a drive will bring the water that cuts across the fairway at the 150 yard marker into play.
Approach: Uphill, into the prevailing wind, to an extremely protected green.
Green: A number of slopes and humps that offers no consistency of direction.
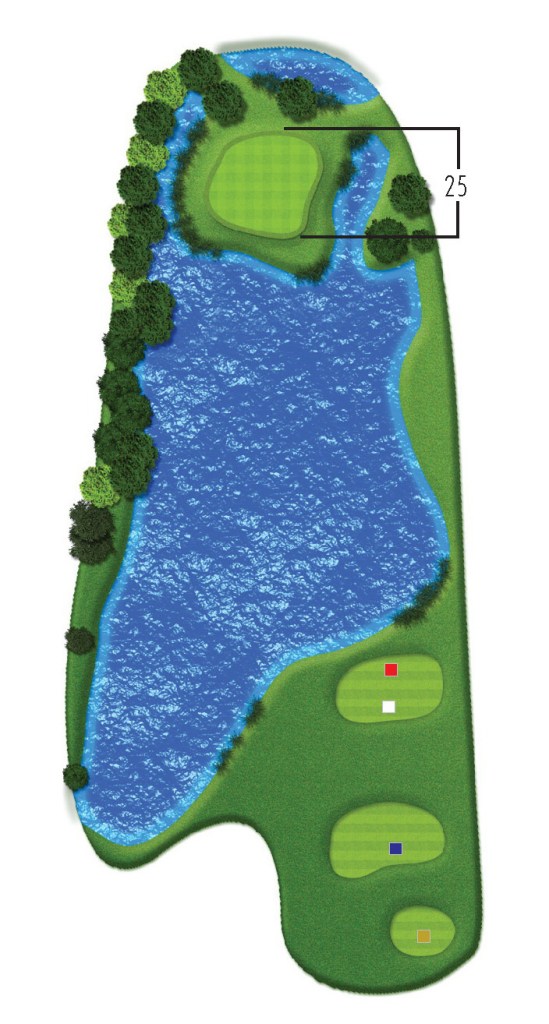
HOLE 3 The View PAR 3
Notes: An island green that leaves no room for error.
Tee shot: If there is any indecision on club selection, go with the longer one. Middle of the green should be the only goal. The drop area is just before the bridge.


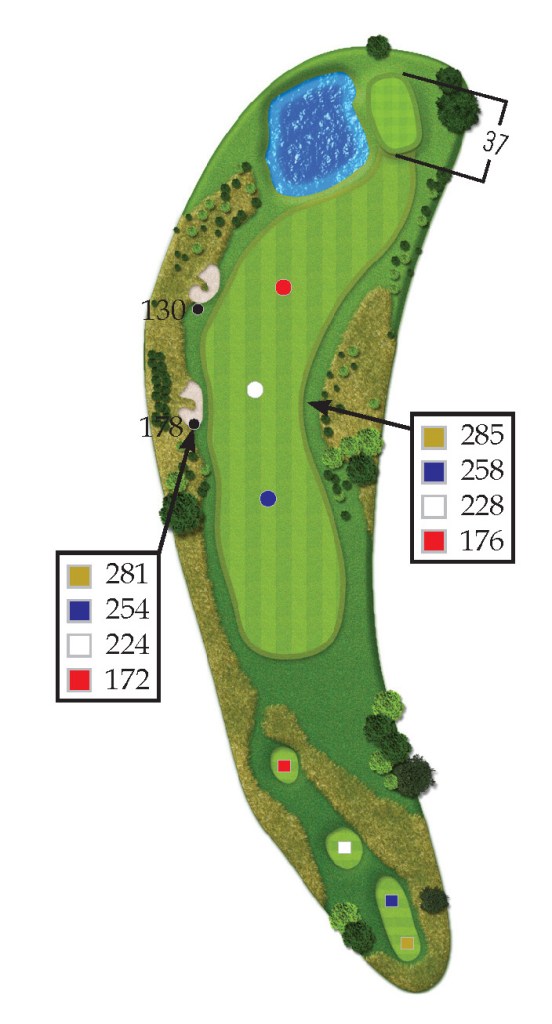
HOLE 4 The View PAR 4
Notes: A challenging mid-length par 4.
Tee shot: A drive up the right side will leave a shorter approach.
Approach: Mind the pin position for both the approach and the putt. A pin cut on the left-side will require and extra club.
Green: A huge swale in the front, middle portion of the green will make any putt hit the stuff in the hole an adventure.
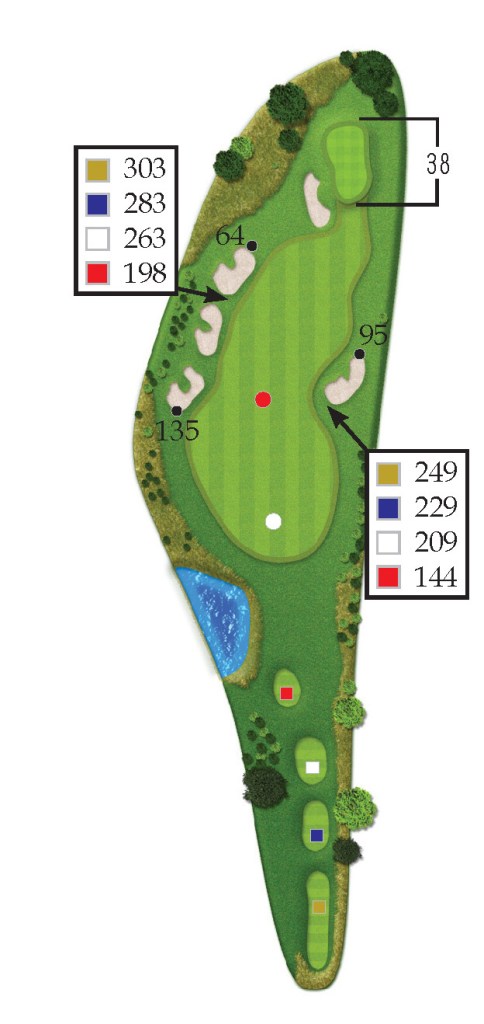
HOLE 5 The View PAR 4
Notes: A short par 4 that will tempt the long hitter to go for the green off the tee.
Tee shot: A shot up the left side of the fairway will offer the biggest landing area while keeping away from the out of bounds that runs up the right side of the hole.
Approach: A long, narrow green that requires the player to hit the proper portion.
Green: A large ridge runs perpendicular to this green.


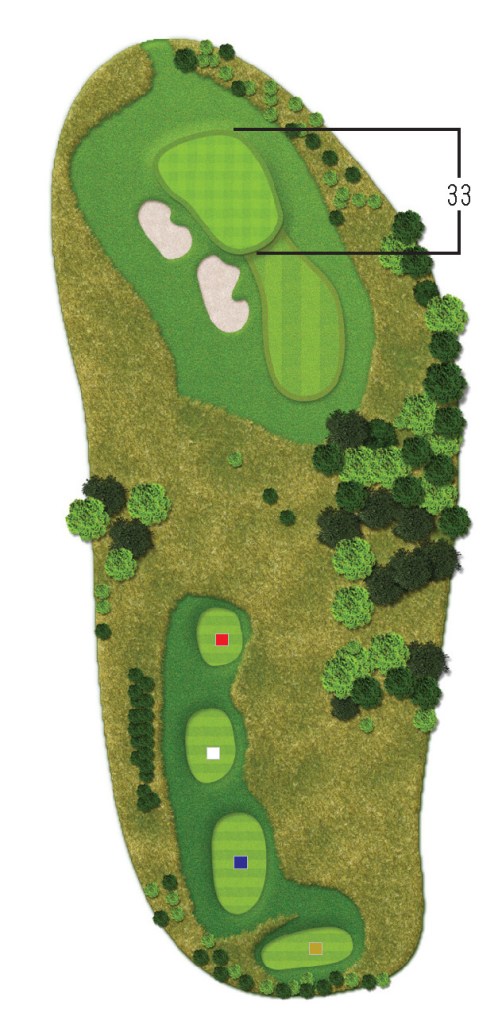
HOLE 6 The View PAR 3
Notes: A visually intimidating, yet beautiful par 3.
Tee shot: A miss to the left will be penalized, a miss to the right still offers a chance to save par.
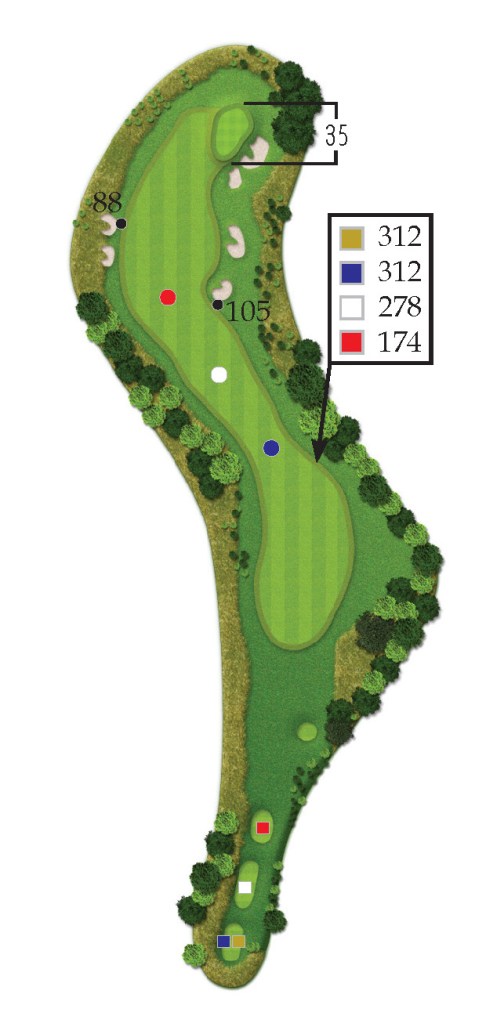
HOLE 7 The View PAR 5
Notes: This double dogleg par 5 must be treated as a 3 shot hole.
Tee shot: The best drive does not tempt the left side, but forgets the generous landing area straight off the tee.
Lay-up: The goal on the lay-up is to be just inside the 100 yard marker to provide a flat lie for the shot into the green.
Green: A severely sloped green makes 3 putting a definite possibility.
HOLE 8 The View PAR 4
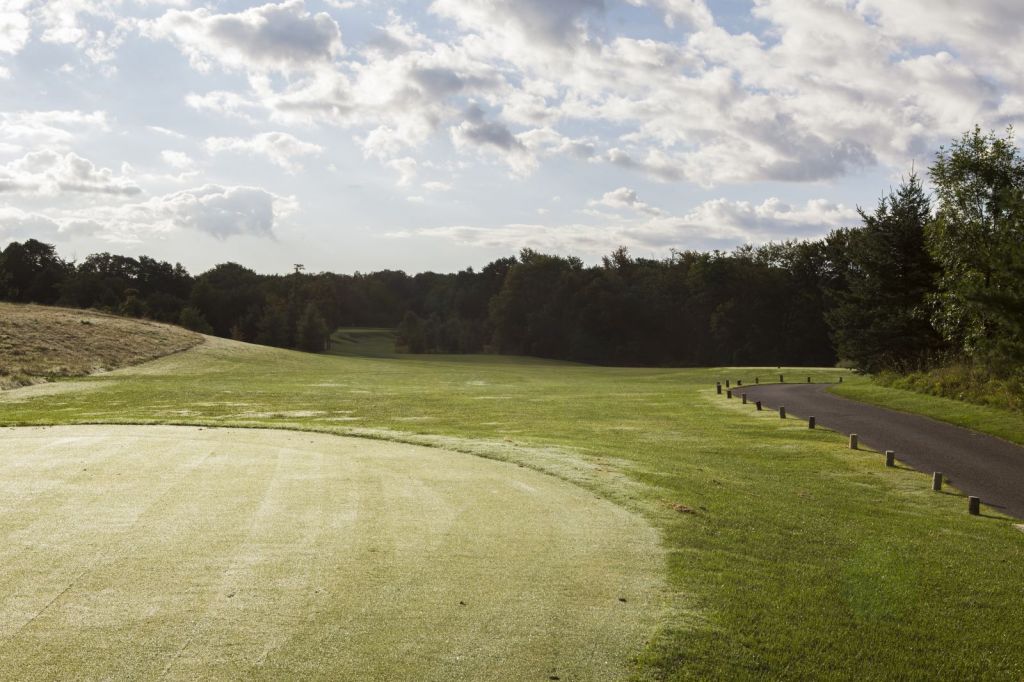
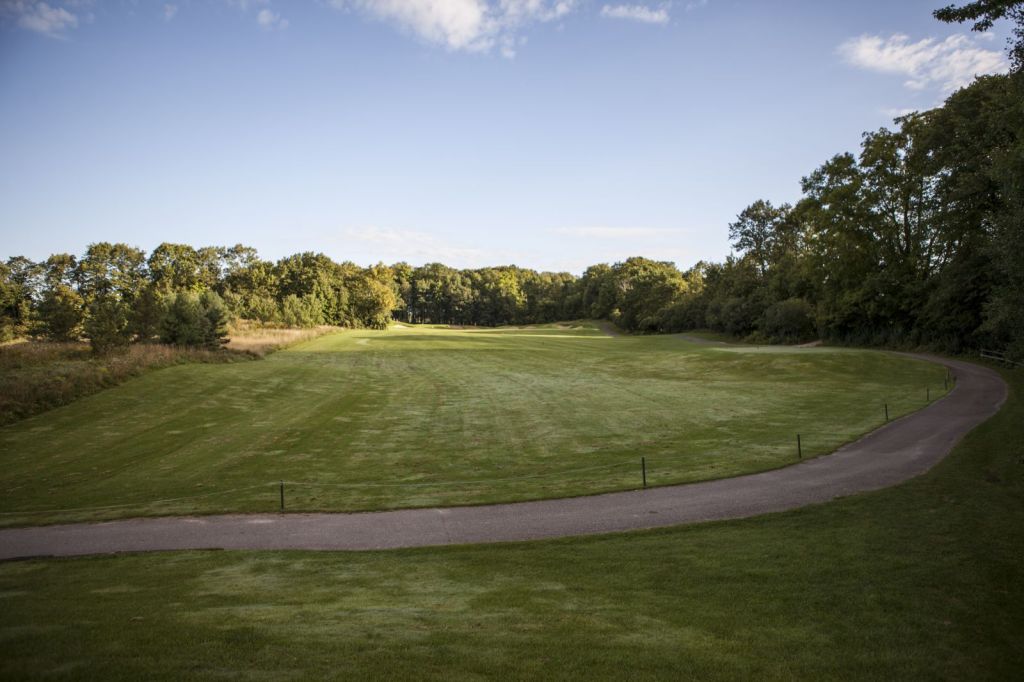
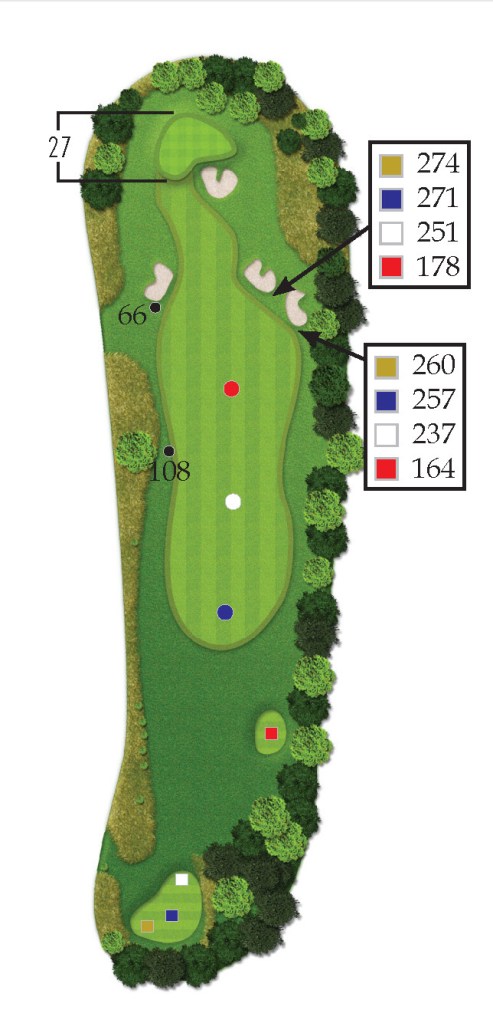
Notes: A short uphill par 4 with a very challenging green.
Tee shot: Length is not the focus, but putting yourself in a good position off the tee should be.
Approach: An elevated green that is shallow and penalizes anything not struck with the proper yardage.
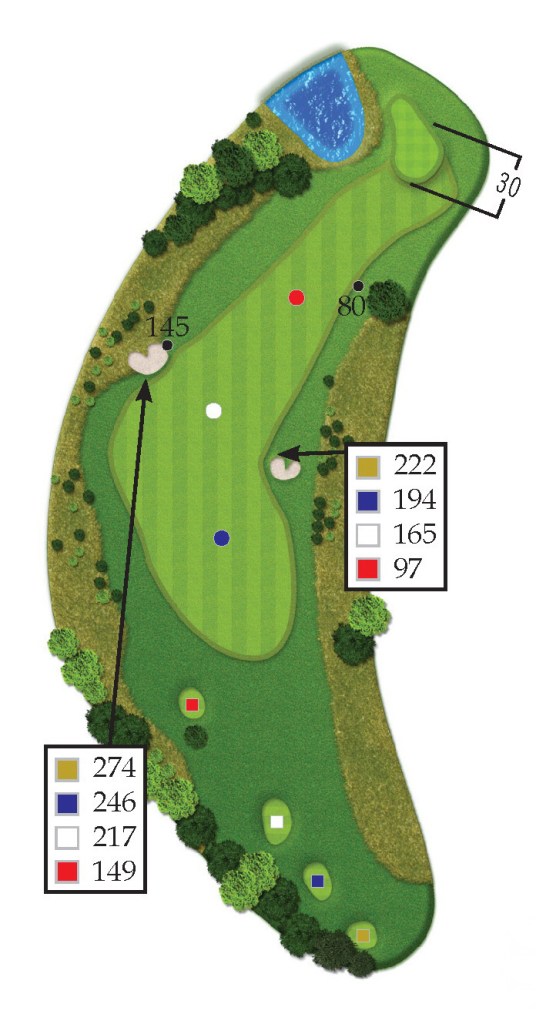
HOLE 9 The View PAR 4
Notes: A dramatic par 4 that allows a chance to get close to the green off the tee.
Tee shot: A tee shot aimed just left of the bunker down the right side will catch the down slope.
Approach: Middle of the green is best. A pin cut on the left side is the superintendent’s evil joke.
Green: Severely sloped from back to front if putting from behind the pin, the ball will run.

